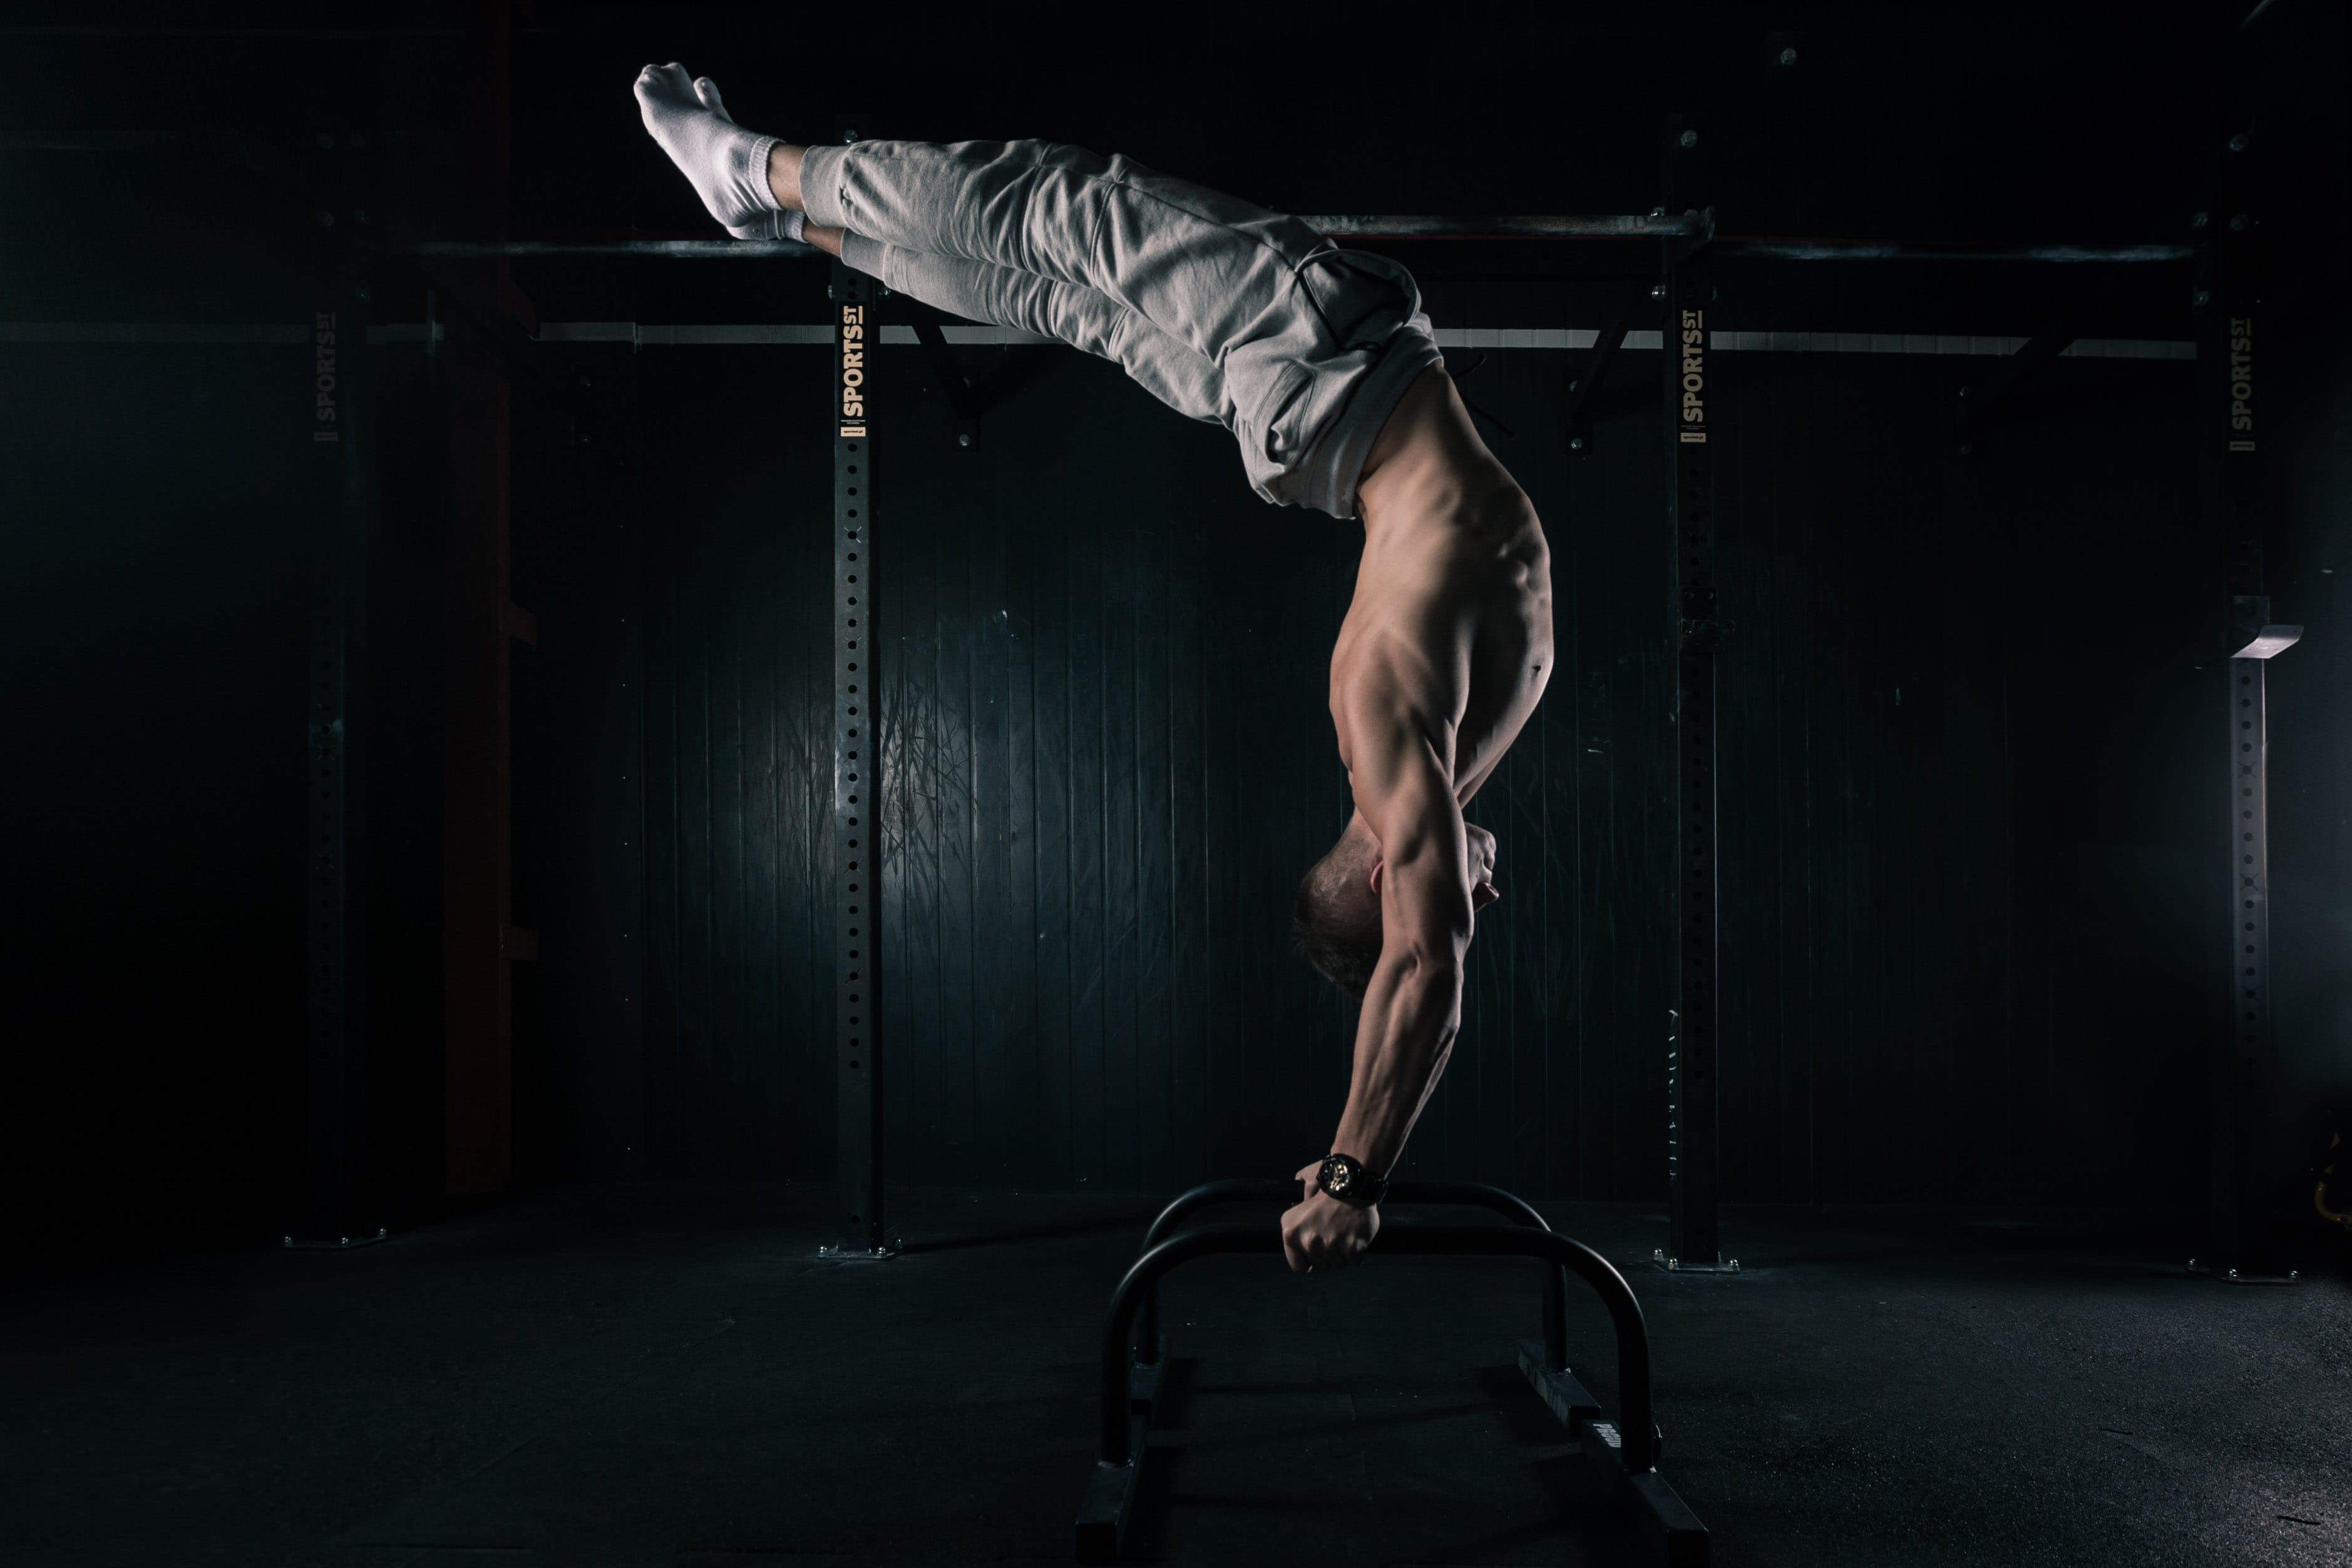
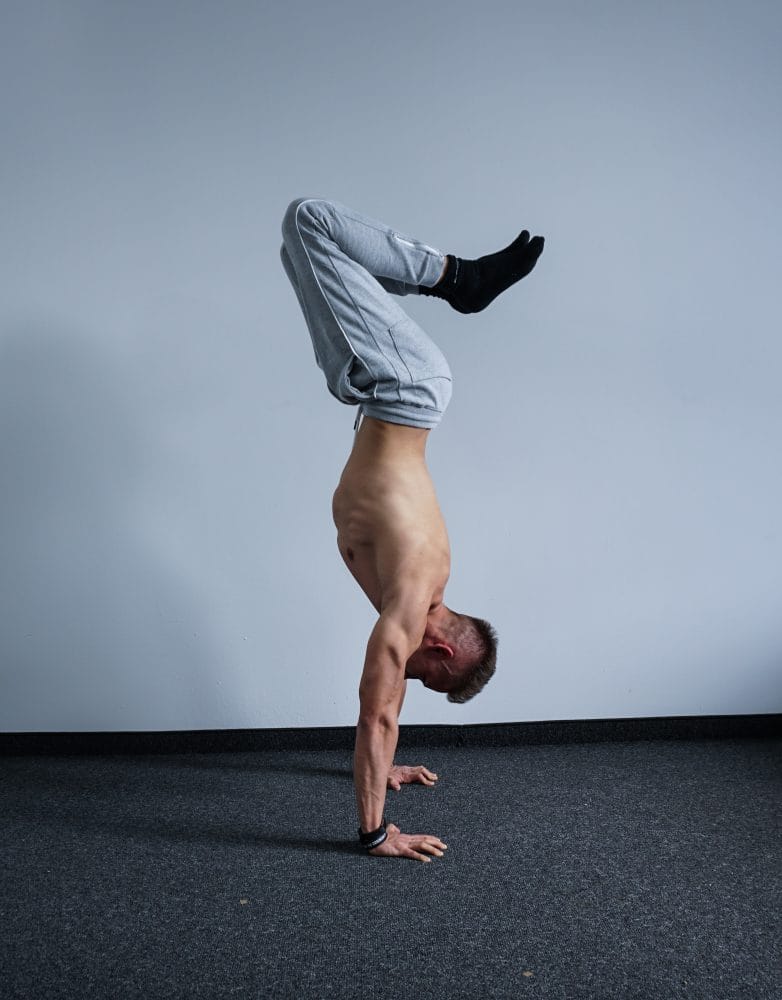
Handstand
![]()
Handstands [TUTORIAL]
Ability to do handstand is a clear proof of body strength and control development (especially hands) to the very high level.
Is there something special in handstand exercises? I don’t think so. Still, there are many advantages of including them in the regular workout. Furthermore, handstand deliver skills which may be unreachable for other exercises.
From the article you will find out, how to do handstand properly, pros and cons, best practices and many more interesting facts about the exercise. For sure, the article won’t cover all details about handstand, still, it will be a great source of basic knowledge.
Doesn’t matter, if you want to learn, how to do handstand or just improve your technique, the post will deliver necessary knowledge and tools to set both goals.
Handstand improves your body in any way
Does handstand give you a body shape from the fitness magazine models in one day? Certainly not. Nevertheless, a handstand is great exercise for increasing strength and body control, and what’s more, it’s really hard to find any other exercise able to beat them in it.
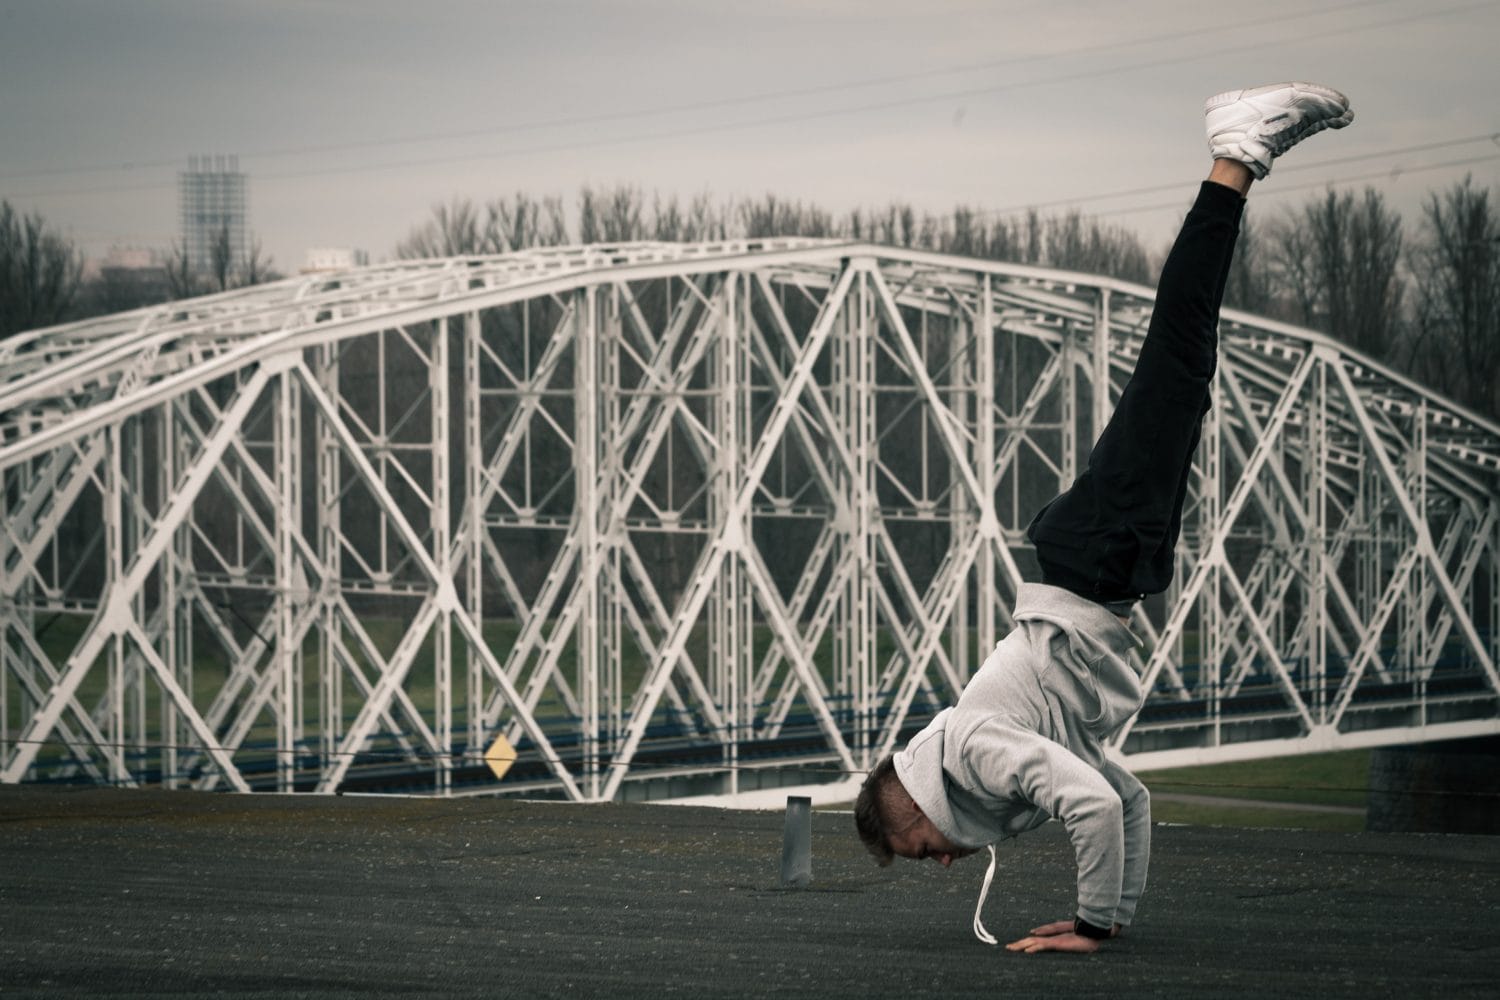
If you were searching for more information about handstand, you have probably noticed, there are many variation of the exercise. Indeed, they have their own advantages, but for the beginners we always recommend to start from the straight line handstand. The reason is, straight line handstand gives you specific skills, crucial in doing other exercises.
Despite of the strong legs and butt, straight line handstand opens up a shoulders, strengthen, tighter core and protects a back.
As you see, if you decide to include straight line handstand in your daily workout, you can expect that performance of any other exercises overall will be better.
A handstand is not about a handstand
We cooperate with many experienced and simply amazing practitioners in balance-building workouts, such as Darek Woś, Mattia Sampaoli.
Trainers with such experience and skills, develop their handstand mainly for improving their handstand’s technique. If you are a regular person, who just wants to improve a condition and body shape overall, benefits of handstand are much wider. You can transform obtained skills to other exercises.
Day-to-day we try to transfer this philosophy to our students in Calisthenics.
The main reason of doing a handstand is not just to do a better handstand but do better in any other exercises. We want you to feel better and improving your condition through developing skills in higher level.
In the text below we have prepared step by step tutorial, how to do handstand properly and effectively helping you improve your skills and body shape.
Step One: Prepare your body
If it’s your first contact with handstand, we recommend to make proper preparations of your body. The worst thing you can actually do is to start handstand without any previous, simpler exercises.
The parts of your body, we need to focus on in the first place, are wrists and shoulders. The explanation is actually simple: those parts are not trained and used to pressure you are going to impose on them. What’s more, from our experience emerges, there are not any similar exercises, able to prepare you for putting whole body weight pressure on the shoulders and wrists. That’s why we have to make sure, strategic parts of the body are ready for the exercise ahead.
Prepare your wrist
Before doing handstand, always start from routine warm-up exercises to make sure, the body is ready for following handstand. This sort of preparation has been emerging from many years of experience and in my opinion, it’s a great way to have flexible, strong wrists and hands which are necessary to do a proper handstand.
In the video you see exercises such as:
- Finger Pulses
- Palm Pulses
- Side to Side Palm Rotations
- Side to Side Wrist Stretch
- Rear Facing Wrist Stretch (palms downs and palms up)
- Rear Facing Elbow Rotations
We recommend to do 10-30 reps of each exercise to make sure, your wrists are well warmed-up.
Prepare your shoulders
Doing a proper handstand requires rock solid wrists in the first place, but warmed-up shoulders are also important, especially in doing a straight line handstand. That’s why, the part of the body preparation includes an exercises enable opening up the shoulders and exalting them as high as possible.
In the following video you will find two exercises ideal for a handstand. Thanks to them, you will gain stronger and more flexible shoulders, which are must have in the following exercise.
As you have probably noticed, we have shown two exercises facing away from the wall. If you want to work on your scapula mobility, in the following video we will show you a perfect exercise which helps you improve a mobility and strength of your scapulas.
No matter, if you are an advanced professional trainer or regular beginner, it will be a bad idea to start handstand before warming-up your shoulders first.
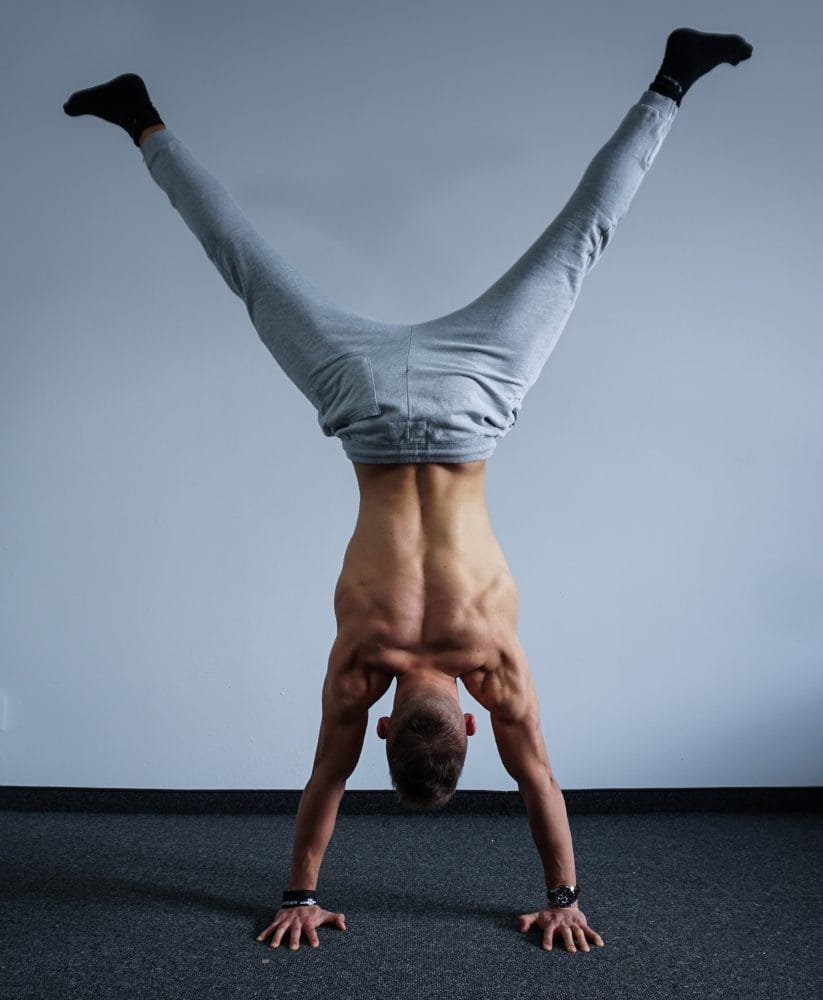
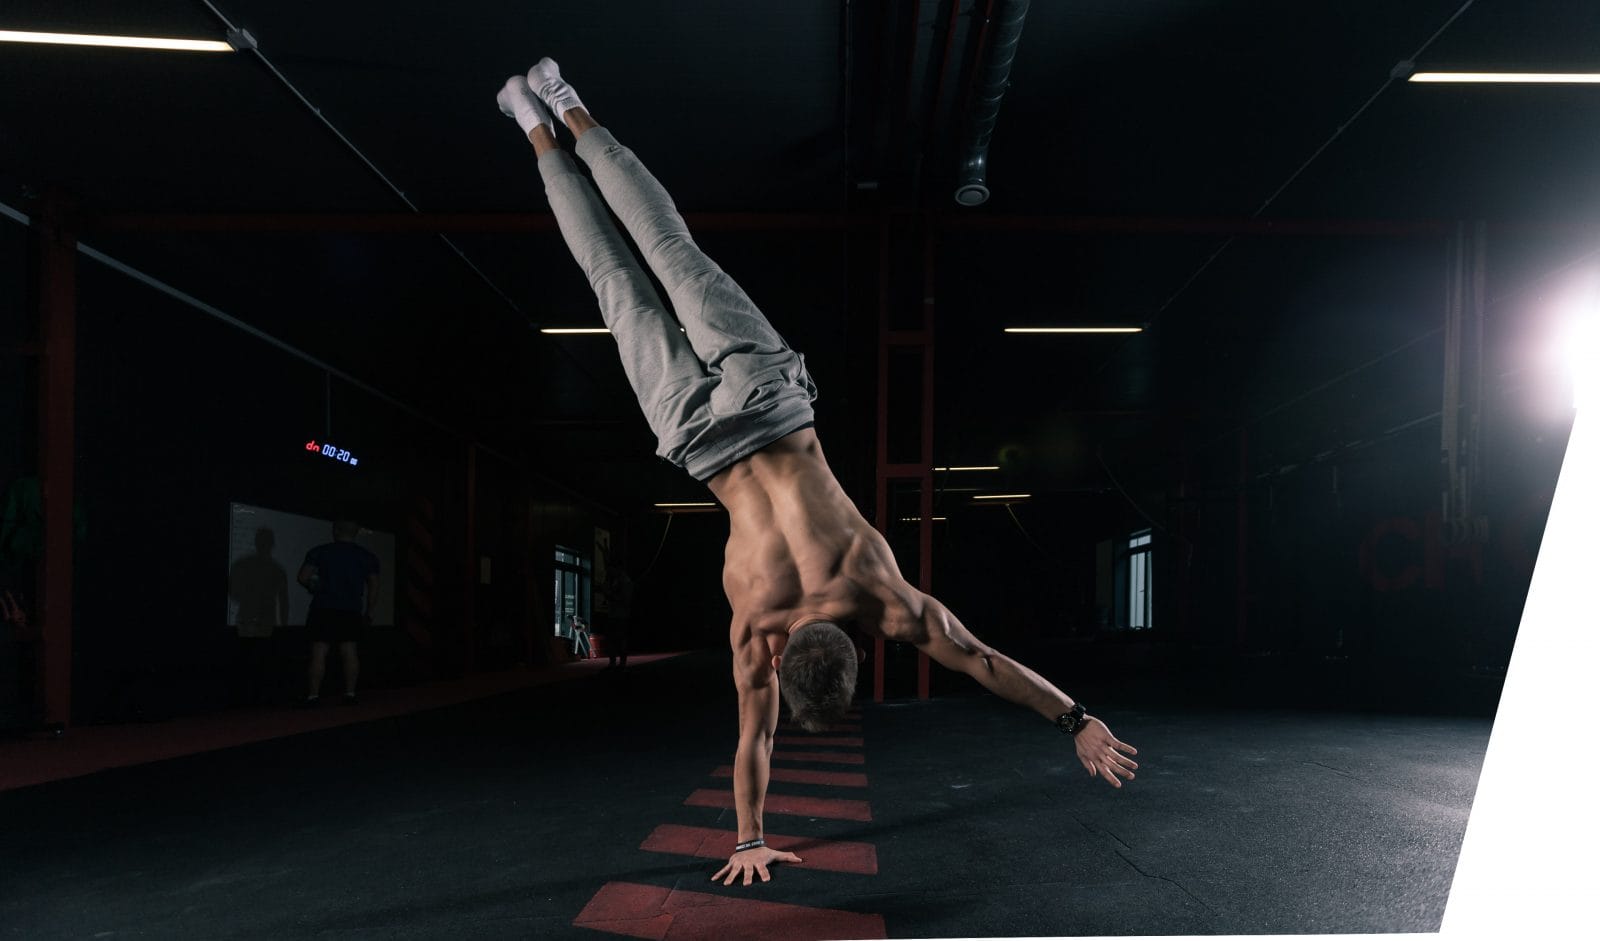
Remember about body positioning
The most important thing in handstand is well-balanced position. Mistakenly placed hands and lack of body control can transform a perfect straight line handstand to a great demise.
Good understanding, where each of your body parts suppose to be in straight line handstand, is a key to keep the center of gravity exactly over your hands. Thanks to that, doing an ideal handstand will be easier.
First attempts to build sort of the awareness and control of the body will be quite difficult indeed, but it takes time when you’ll gain full control to that level, you will decide exactly, where the gravity center must be. The good news is, after a couple of trainings it will be a piece of cake.
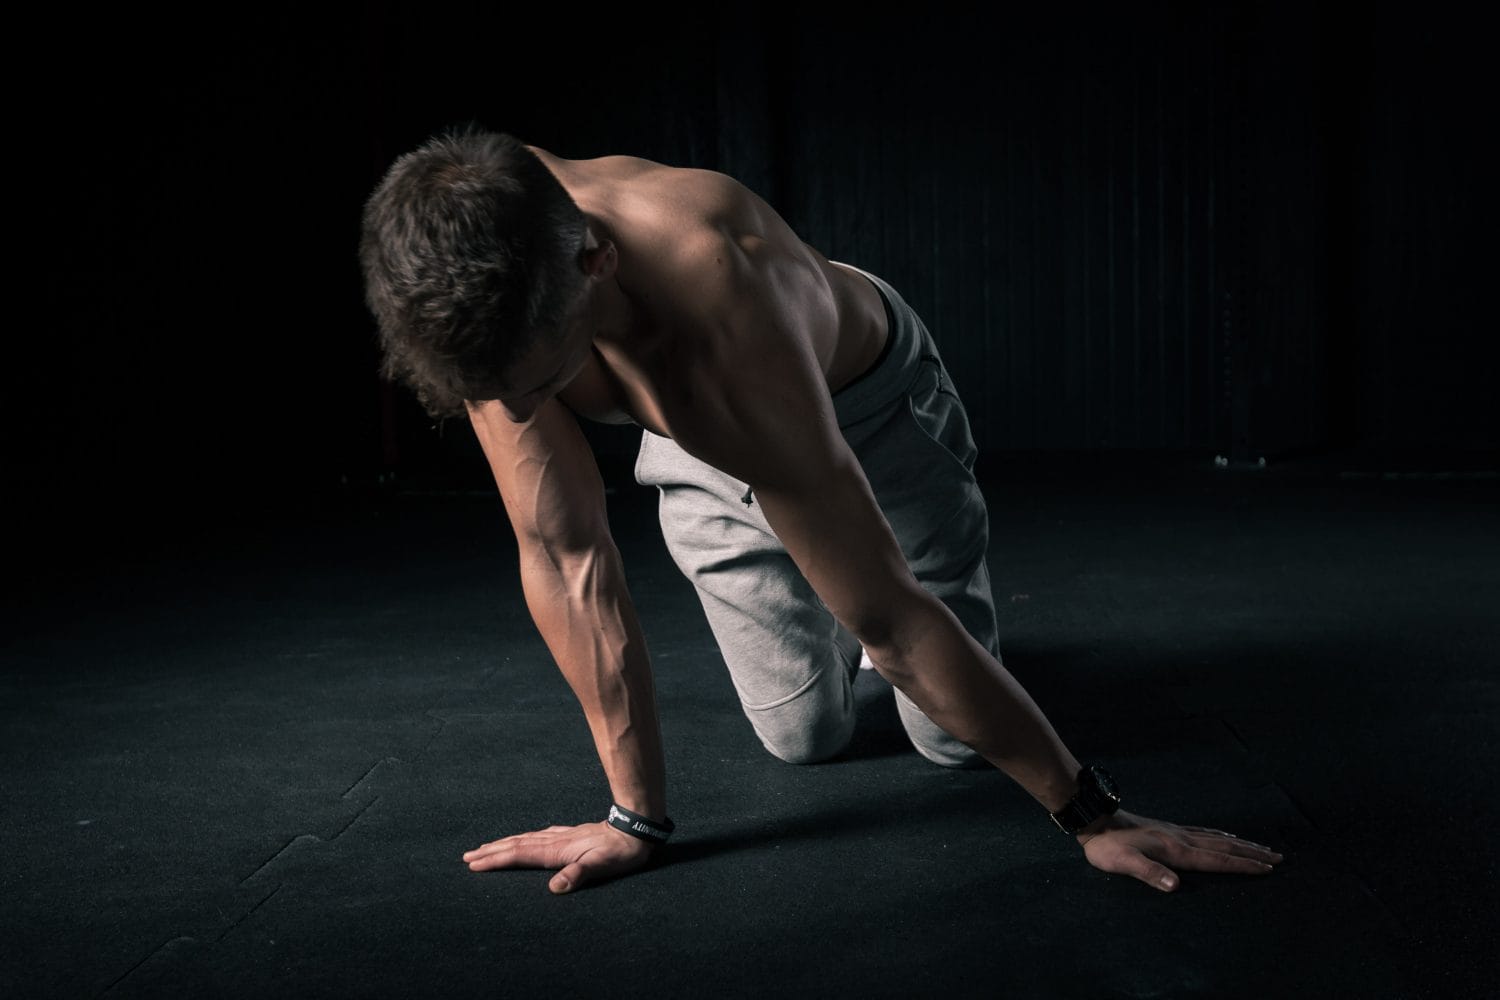
Core strength and control – the cored body position
The cored body is the nut of the straight line handstand. Treat a floor not only as a help in making your body stronger, but as your supporter in freedom of reaching the position you suppose to have during the handstand. Before you start, spend some time to get familiar with the exercise and you’ll see lot’s of advantages in the future.
In the video below, you will see some variations of the cored body hold.
Keep in mind to do not bite more than you can chew and adapt the level of the training to yours.
Hand positioning
Place your fingers wide and put the hands in the width of your shoulders on the ground. From my experience, many practitioners forget about splitting fingers and keep them narrowed, what makes more difficult to hold necessary balance.
Our main challenge is to increase the support possible to get from hands, that’s why you need to do your best to press the palms strongly into the floor.
Elbow positioning
Place your elbows turned inward to make sure, the parts of them called elbow pits are placed opposite to each other. First attempt probably won’t be successful, but you need to keep practicing to be able to place them in that position without an effort in the future.
Straight elbow positioning helps you in putting your shoulders into the proper position and what’s more, your body doesn’t have to put such an effort in maintains your body like with bent elbows.
Shoulder positioning
If you want to put your shoulders in a perfect position, try to lift them up as much as possible. At the same time, try to pretend like you want to hug your ears by the shoulders.
It could be helpful to put your hands on a strength piece of a board or tubing and push the hands over your head and keeping closer your shoulders to the head also.
From the practice to practice probably you will pay more attention to the more detailed aspects of the straight line handstand. Also, you will find out, how important are properly turned elbows in the shoulders positioning too.
Let’s say, if your elbows are placed too wide in comparision to your shoulders, shoulder blades naturally will try to come together instead of be lifted up towards ears like they suppose to.
Handstand head positioning
If you want to gain proper, straight line you need to remember about properly placed head.
From our experience, beginners do not pay much attention in their head positioning. Instead, they are coming up with comfortable position being upside down. In the same time, heads are turning around, what actually has a great impact on body balance.
From the video below, you will find out, what do we recommend in that matter:
As you see, if you want to do a straight line handstand, try to place your head in your natural position.
Lowering your body position
Usually, the beginners do not pay much attention on lowering body position and from my experience, most of them do not see bigger involvement in straight line handstand at all.
The truth is, they are wrong. The handstand requires at some point to keep high pressure on your shoulders and hands. Then you realize, how significant is to have an appropriate hands position.
When you are sure you have placed your hands in right width (with splitting fingers), all you need to do is lowering and lowering… and lowering :-)!
At that very moment you need to remember about pointed, joined feet and properly squeezed legs as tightly as you able to do. Also try to keep your butt tight and keeping feet as you can reach them the roof upon you.
Breathing in handstand
Except from your body position, ability to breathe in the appropriate way is also very important in terms of doing a perfect handstand.
Th theory says, you need to try to breath the same way as usual. Indeed, it is really easy to say, but more difficult to do.
After the lecture of the article, you know, have to prepare your body and mind to do a straight line handstand. The best part is in front of you. Let’s have a look, what kind of progressions you can do in freestanding handstand.
4 Freestanding progressions – step by step.
Each of us is different. Some trainees have a solid background in terms of body strength and control, but others just make firsts steps in doing freestand handstand. That’s why, some of us may move on with each progressions quickly and others need more time to overcome first progression. Remember, that the most important thing is to adapt the tempo to your skills and knowledge. In that way you will gain additional skills successfully.
Progression name: Walk Walk up
Details:
- Put the hands on the floor in that way, you are able to place both feet up on the nearest wall.
- Try to move the hands as close position to the wall as possible (couple of inches)
- Keep your knees straight and put the ankles to 90 degrees till the moment, when your toes are touching the wall.
- Place your body in the cored position (we’ve trained earlier) and put your chin to your chest so that you are able to see the wall behind you.
- After you’ve progressed to 6-8 reps for 30 sec holds, move your toes in that way the top of the toes are on the wall, keeping the same position at the same time.
Progression name: Kick Up on Wall
Details:
- In the Kick Up on Wall progression, you will turn your body in front of the wall. Place the hands next to the wall with fingers put to the wall.
- Try to press the floor as strongly as you can, take one leg to the wall, allowing the other leg to follow at the same time. It’s much harder to do like to write, but only regular practice helps you to do it!
- When you’re up on the wall, try to hold the cored position as before. Try to be as tight as you can throughout your body.
- Use your hands to push the floor, widen your shoulders and importantly – make sure, all body parts are placed along with all given cues.
- Before move to the next progression, make 3 sessions for 8 reps (30 seconds each)
Progression name: Float from the wall
Details:
- It’s significant part, before your toes leave the wall. Treat the progression as a last part of the Kick Up on Wall progression.
- In the very moment you feel comfy with the kick-up, move your body to the proper position and try to press the floor as strongly as you can.
- Try to let your feet leaving genuinely the wall (with out forcing them by yourself) by pushing your hands into the floor and widening through the shoulders.
- Make 3-4 reps of 30 sec floats each of the wall. When you will be able to that them all, you are ready to do freestanding kick ups.
Progression name: Freestanding Kick-up
Details:
- Focus on kicking only one leg up. You will see, the other leg will follow the first one.
- Make a couple of reps of collecting legs together.
- When you reach the balance in holding your legs together, you will be able to improve the freestanding kick-up in the future.
As you see, at the end of the video I have shown you different freestanding poses which are finished with a straight line handstand.
First one will support you in strengthening your body. Personally, I prefer that position because of it’s great impact on other body skills.
Doing a proper handstand is as much crucial as possessing the knowledge, how to transform your body, when you want to finish your performance in a good way. When you feel, you are going to fall, the best way is to place the legs in cartwheel way, as you see in the video below:
Video will be uploaded soon.
Practicing – timing and frequency
It is really hard to recommend, how often and how long do you suppose do a handstand. The reason is, everyone is different and differ in terms an experience and a body skills. Also, each of us faces different challenges and has his own way to defeat them.
Like in any sport discipline, the core rule is always better to exercise more than less, even it it’s only 10 minutes a day.
A well-performed technique is to set an alarm for 30 minutes. At that time do handstand and preparations as long as you are able to do them properly, without overworking. According to your skill level and body strength, try do some pauses during exercises instead of practicing for 30 minutes in a row.
Thanks for that approach, you will be able to train longer with good attitude and performance.
TOP5 practice for successful handstand
- Before start the exercise, warm up your shoulders, arms and wrists. Always.
- Remember about proper breathing and position of your body.
- Exercise with a wall may not be easy in the beginning. Try with basic handstand exercises first.
- If you feel comfortable with freehandstanding, start with bailing out.
- Adapt workout to your experience and skill level – take your time.
Handstand training – the next level
Before thinking about more advanced, depending variations, you need to be aware that you have to spend some time on the basics like a straight line handstand. Depending on the person, it may take a couple of months and sometimes even couple of years. That’s why it’s so important to be patient and do not set time frame goals for practicing variations from the following sections.
In other case, if you have some experience and needed skills to do a handstand, it could be interesting for you, what kind of different variations you can practice in the future.
Variations written below are some kind of bullets, in which direction you can go with a handstand. Treat those as some propositions which needs additional research. As I have suggested before, the main reason is to show you the basics for handstand and how to prepare your body for the exercise.
Straddle
Surprisingly, far more difficult than making a particular variation is to get into the handstand itself. To straddle legs up in the air requires developed body control and strength. You need a lot of time to overcome needed skills.
Tuck
If you overcome basic straight line handstand, the tuck handstand is a pretty nice next step. The exercise will help you maintain the line from the tailbone to your shoulders and strengthen your body control and stability.
Push-up
People with quiet expanded knowledge and skills in standard handstand often perceived push-up handstand as the next step. What’s more, if you have a good understanding, how to make them properly and effectively, the way to perform a handstand push up seems to be maybe not shorter but sure.
Split
Beside well developed strength and body control for standard handstand, to perform a perfect split handstand, you need to train your flexibility in advanced.
Without the skill of doing the same legs split on the floor, it will be almost impossible for the same in the air that’s why me do not recommend variation at the beginning. To prepare your body for the exercise, check our exercises for improving flexibility and strength of your hips (will be uploaded soon).
One Arm
That particular variation is suitable only for really advanced handstanders who perfectly overcomes standard handstand with the ability to perform it for about 60 second or more.
The One Arm Handstand is surely pretty nice and impressive variations available only for experienced performers. If this is your goal, you need to take long way before you can make it. Is it worth it? Yes, indeed and furthermore, it will open up your body for much more interesting training opportunities for your body not only in sport matter.
Handstand’s capabilities
People who can actually perform an impressive handstand make interest. Besides of a hard work and sweat, a handstand is also a great fun. Furthermore, ability to make handstand give you completely new opportunities in terms of the body strength, control and balance.
Still, handstands with all variations are something far more like solely entertainment.
Overall, making exercises allows your body to move in the new, extraordinary way and simply keep you in a good shape. Like you probably realized now, handstands allow your hands, butt, core and shoulders appropriate training and what’s more, develop your control and balance skills. Simply said: your body can do much more.
It’s like doing math. If you want to make any advanced calculations, you need to get the basics first and for more advanced – overcome additional skills and knowledge to have proper bases.
If you want to start building your physical skills to do handstands in the future, there is no better way like to start exercising with one of our calisthenics workouts.
In our workouts you will find many types of exercises with a wide range of variations and progressions, needed to perform a perfect handstand. No matter if you are a beginner or advanced trainee, you can adapt the workout to your specific needs and goals.
Build your strength and body balance for a handstand
Good luck!