ELBOW PAIN TREATMENT – LATERAL EPICONDYLITIS (TENNIS ELBOW) AND MEDIAL EPICONDYLITIS (GOLFER’S ELBOW) – PART 1 of 2
![]()
ELBOW PAIN TREATMENT
What’s going on dear fam!! Today we’ve decided to take a break from bar/rings/parallettes trainings and dedicate a separate space to talk about a very common and yet disturbing pain that might come in along your Calisthenics/Street Workout journey.
We are talking about the elbow pain, an issue that, until present day, I’ve been hearing many athletes talking about, trainees of mine and newbies who are just amateurs of the discipline approaching the first steps without good “fundamentals”.
How many times you heard as well talking about it and mostly how many times you heard people dealing with it for an endless amount of time as if there’s no clue for it.
Well, truth is that, the following issues, which we can consider the most frequent ones, can often cause elbow pain:
- Being in a rush in trying to achieve the main skills of Calisthenics, with particular focus on static skills such as planche, front lever and back lever
- Lack of strength and conditioning in tendons and ligaments, hence a non-sufficient conditioning, especially in forearms (elbow flexors and extensors) for whose performing straight-arm exercises becomes a torture rather than a further step towards a determined skill
- Lack of form in the technique, hence the way of performing the exercises, especially the straight-arm ones, for which a compensation using different muscles might be involved resulting in a stress which can lead to elbow pain; also an unconscious movement which leads to a bent arm form rather than a straight one, can generate the same issue
While keeping in mind these three main causes, we can now distinguish into two main types the elbow pain:
1. LATERAL EPICONDYLITIS (TENNIS ELBOW):
is a painful condition of the elbow caused by overuse.
As you can see, it’s not only typical among tennis players, but also among Calisthenics performers, due to many different exercises involving a straight-arm position and for whose seems to be a frequent issue
In particular, epicondylitis results in an inflammation of extensor muscles and tendons that join the forearm at the outer side of the elbow
2. MEDIAL EPICONDYLITIS (GOLFER’S ELBOW):
opposite of the previous common elbow pain, is the so-called golfer’s elbow (medial elbow pain), which involves an inflammation in the inner side of the forearm.
Compared to the lateral epicondylitis, the golfer’s elbow targets mainly the flexor muscles of the forearm which can also lead the pain to spread out to the wrist.
Its most common way of manifesting is through a gripping movement as it is for Calisthenics where most of the time you need to hang on something like a bar, on rings or on high parallettes
Now that we have identified the two most common types of elbow issues, we would like to provide you with an exhaustive and yet easy-to-use guide that might come in handy if you already have such problem in order to reduce it or, in case you don’t, in order to prevent it.
WRISTS STRENGTHENING EXERCISES
Let’s start by gathering some of the most common exercises, methods, techniques and tools you might wanna include in your lifestyle in order to treat, in the most natural way possible, an eventual elbow pain that might arise along your journey.
We wanna make sure that what you are going to see is easy to understand, to perform and mostly that provides you with benefits and relief in the shortest time possible.
In order to achieve these goals, we also suggest breathing in the most relaxed way possible while performing each of the exercises showed below.
Let’s see how we can deal with these two types of pain, by following this first short routine which includes both stretching and strengthening exercises targeting wrists, forearms and elbows (the three main parts involved):
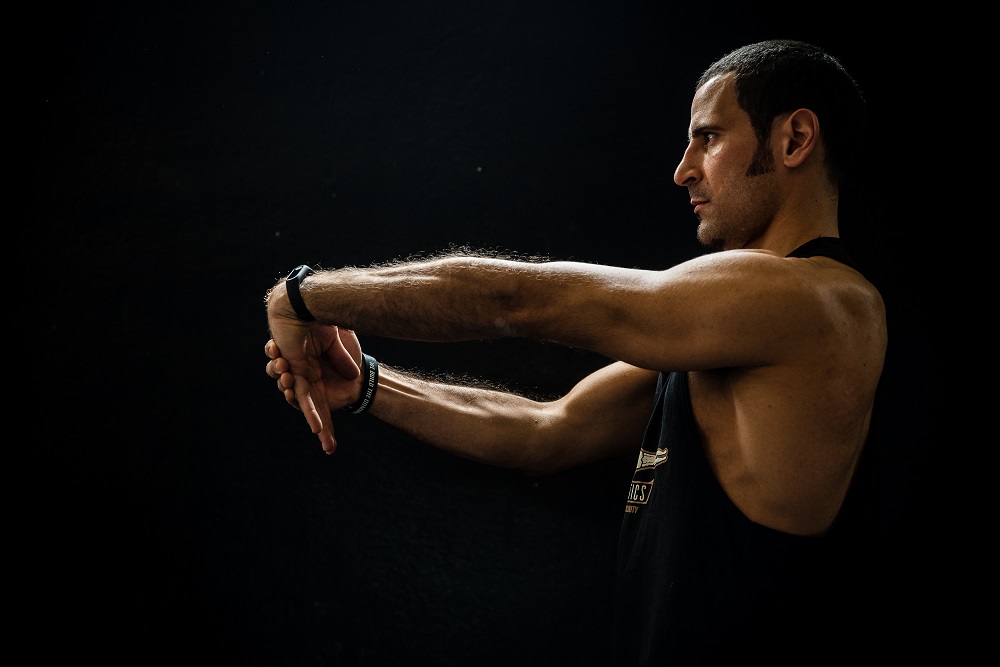
- EPICONDYLITIS/GOLFER’S ELBOW – WRIST ACTIVE ROM (RANGE OF MOTION): one of the most natural exercises used and yet very common when it comes to elbow pain, in this case particularly indicated for epicondylitis relief
The goal is to straighten out one arm at a time in front of yourself with the hand bent down.
From there, start making controlled movements up and down with your hand while keeping the forearm completely firm.
3sets x 10reps each arm
- EPICONDYILITIS – WRIST EXTENSORS STRETCH: keep one arm straightened out; bend the wrist so that fingers points down to the floor and from there hold the position; you can also try to close the hand into a punch for repetitions, this should stimulate a further activation of the extensors (and partly of the flexors).
Once this position becomes lighter, place the other hand on top of the one that is actively stretching and press it towards your chest.
3 sets x 30 secs hold each wrist

- EPICONDYLITIS – FOREARM STRENGTHENING: by means of a little weight like 1,25-2,5 kg to start with, then it can be progressively increased, which can be a dumbbell for instance; place the forearm on a surface so to isolate the movement just to the wrist.
From that position, place your hand pronated so that it targets the extensors.
Start raising up and down the weight in order to re-enforce the elbow extensors
3 sets x 10 reps each wrist (linear movement)
After that, change the sense of execution and move on to a rotatory movement.
This means that, starting from the same position of the forearm on a surface, you can either decide to start from a 90° angle to the left and rotate all the way to a 90° to the right and back or start with your wrist in vertical position and the move it down to a 90° angle pronated and back.
The second variation of this exercise, wants you to rotate instead of a full 180° angle the wrist from left to right and back while holding the weight in your hand.
Of course, by doing so from left to right, you are gonna target both flexors and extensors.
3 sets x 10 reps each wrist (rotatory movement)
- GOLFER’S ELBOW – WRIST FLEXORS STRETCH: in order to actively stretch the wrist flexors, straighten out one arm at a time in front of yourself with hands’ fingers facing up to the ceiling.
Compared to the extensors stretch, this time you wanna make sure to apply pressure on your hand’s fingers and pull them towards your chest from the upper side
3 sets x 30 secs hold each wrist
- GOLFER’S ELBOW – FOREARM STRENGTHENING: same as for tennis elbow, golfer’s elbow follows the same strengthening exercises just seen above.
The only difference regards the first exercise and, in particular, the linear movement up and down.
In this case to target the flexors, you have to start with one wrist at a time supinated rather pronated.
3 sets x 10 reps each wrist (linear movement)
As said above, also the 180° exercise works the same, so no changes are required in terms of position and execution
3 sets x 10 reps each wrist (rotatory movement)
THE FLEXBAR
After analyzing these quite common exercises for elbow pain release of both types, let’s take a look now at a revolutionary tool that will definitely become a must: the flexbar.
Let’s take a look at how it looks first thing first.
As you can see from this picture, it’s quite of a simple tool made of rubber, but provides you with incredible benefits to your elbow, if used properly.
Usually, are existing three different types of flexbars distinguished with different colors, diameters and most of all of different hardness.
HOW TO USE IT
In order to use properly such tool depending on which pathology you have and so tennis elbow or golfer’s one, the technique is similar.
- FOR TENNIS ELBOW: grab the flexbar at the bottom with the hand from the side that hurts, starting from a vertical position in front of you with bent arm.
Then, grab the top of it with the opposite hand, but with the hand’s thumb facing the floor and its back facing you. In this way, as soon as you try to bring the flexbar into a horizontal position by holding the grip tight with the hand at the bottom, you will be applying already a torsion like twisting the throttle of a motorcycle on it.
Keep twisting the flexbar until both hands are in line and then bring them down at a waist-height. Release slowly the hand (of the affected side) in a clockwise sense hence forward and, by keeping always the flexbar in the same horizontal position with both arms straight, reach the neutral position and repeat all over. This type of technique allows you to re-enforce the elbow’s extensors.
Each release should last around 4 seconds before going for the next one.
3 sets x 15 twists+4sec eccentric release
- FOR GOLFER’S ELBOW: grab the flexbar at the bottom and reverse it upside down always in a vertical position with bent arm.
With the other hand, grab the opposite end, straighten both arms and keep the grip lower at waist-height once again; from there release slowly in a counterclockwise sense the affected hand, counting always 4 seconds approximately and repeat all over as above.
3 sets x 15 twists+4sec eccentric release
Since it’s been already tested on many affected subjects, in both cases, this type of exercise should be performed daily for at least 6 weeks in order to get concrete results.
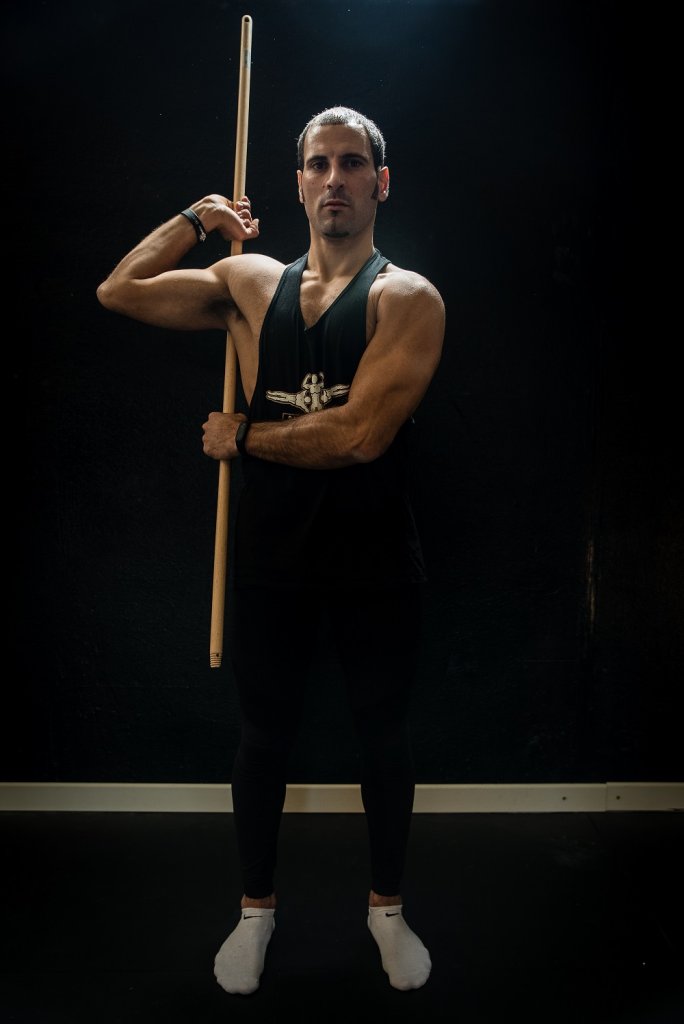
STICK ELBOW/SHOULDER STRETCHES
Another very important tool that shouldn’t be underestimated for fixing elbow issues is a simple wooden stick or broomstick as well.
By its means, you can perform just a few and yet very effective exercises for treating elbow and shoulder pain.
In detail, I can say that with the following three different exercises, you can create a simple routine that can be included in a more complete one so to get the best benefits out of it.
I suggest performing these type of exercises after the workouts or in a separate de-loading session since before a workout might not be the best thing to do since you wanna keep your muscles ready for the work.
Let’s take a look, through the following pictures, on how the stick/broomstick has to be gripped since the very first time might cause some difficulties due to the different positions you have to get:
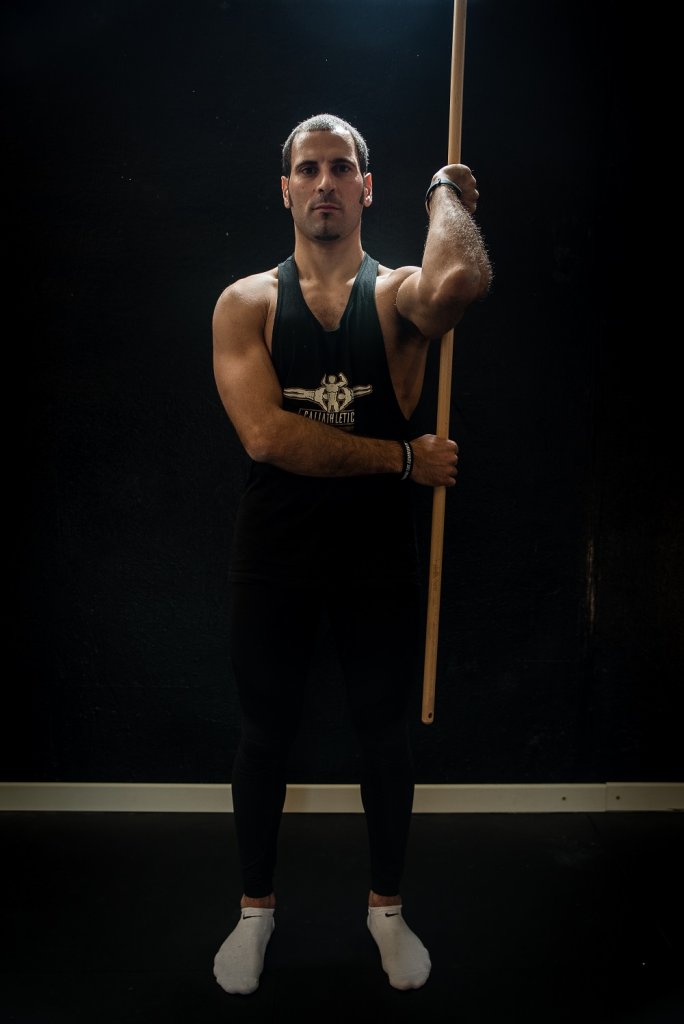
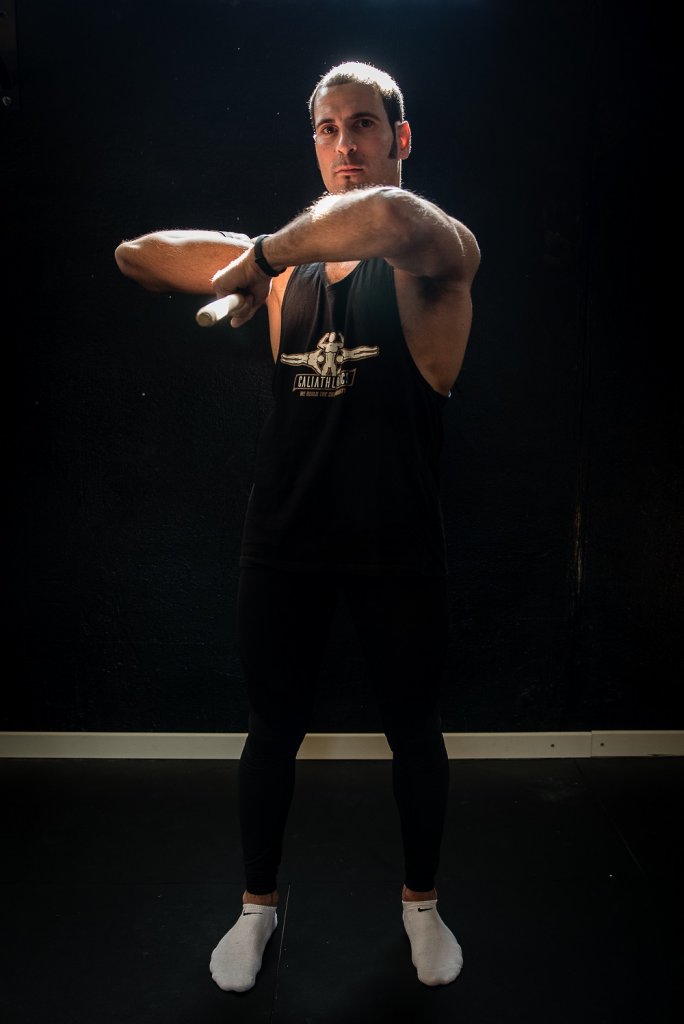
- STICK SHOULDER TORSION – ELBOW IN: from the title you might think of a quite complicated position to get, in reality is farther simple than it might sound.
Perform this exercise from a regular stance on foot, same as the following two ones.
Grab the stick always from the bottom with one hand, bring it to the opposite side so, for instance if you grab it with the right arm, bring it to the left side in direction of the shoulder.
Elevate the other arm bent in 90° so that it crosses to the inner side the stick/broomstick and get into a reverse overhead grip with the other hand on it.
You’ll have one hand in regular grip (the one at the bottom) and one in reversed overhead grip (the one at the top).
Apply the force of stretch in direction of your stomach, hence to the inner side while keeping the elbow in front of your face, elevated in perfect line with your shoulder (to the inner side too); in this way you act mainly on the rear deltoid, the elbow and partly latissimus dorsi.
3 sets x 10-15” hold (minimum)
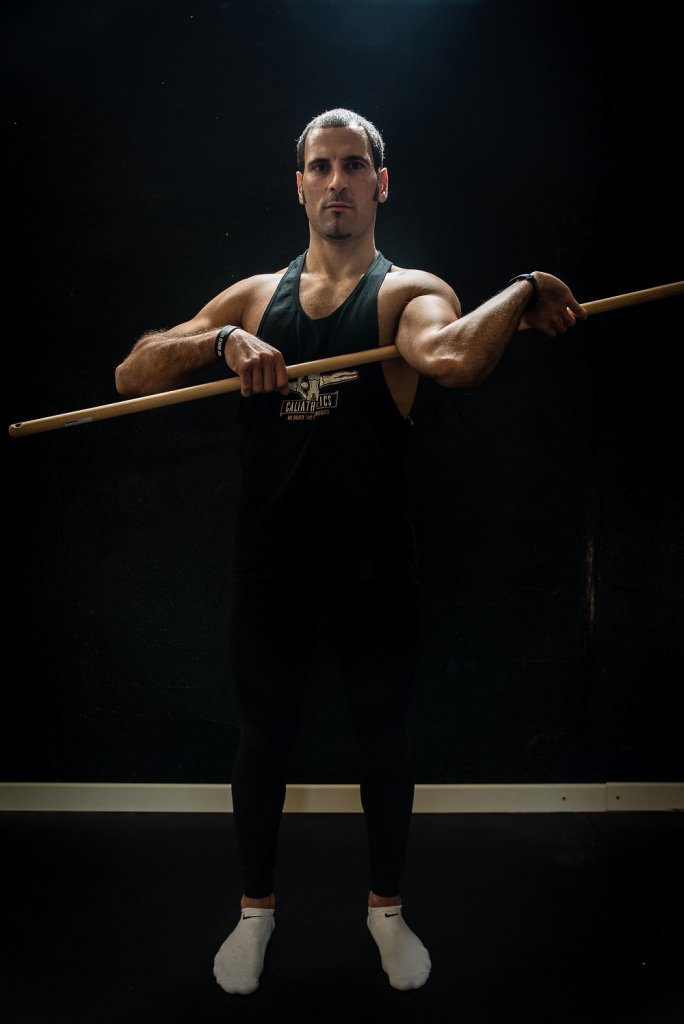
- STICK SHOULDER TORSION – ELBOW OUT: the starting position is similar to the one above with the difference that the elbow this time turns to the outer side, but again in line with your shoulder.
While stretching, the stick/broomstick goes forward in front of you so to act mainly on the rear deltoid and the elbow as well.
3 sets x 10-15” hold (minimum)
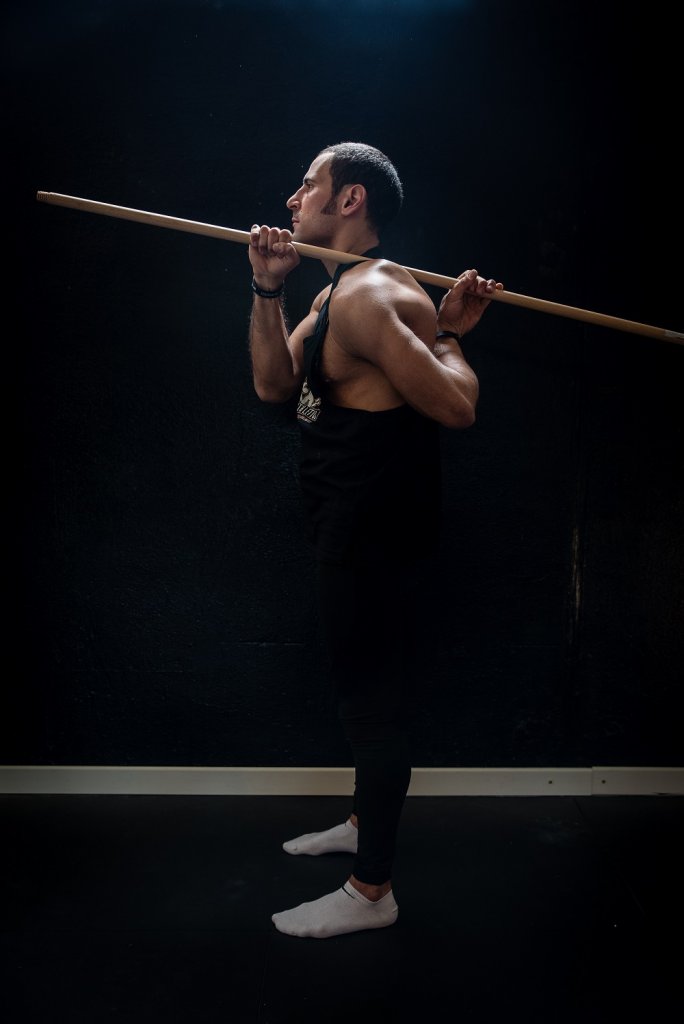
- STICK BEHIND THE BACK – INTERNAL SHOULDER ROTATION: this position differs from the previous ones and is more complicated to get, at the very beginning.
Grab the stick with one hand at the bottom once again, place it behind your back with the back of your hand touching your lower back; the other hand crosses your face and grabs the top of the stick.
From that position start stretching the shoulder by bringing the stick forward and in front of you, the hand behind the back keeps grabbing the stick/broomstick.
3 sets x 10-15” hold (minimum)

 ADDITIONAL EXERCISES
Completing the list of exercises above which, as you noticed, includes the use of different tools such as a stick or broomstick and a flexbar, I think it’s also important adding the following ones to complete the “puzzle”:
- Pectoral-front deltoid-elbow stretch (dynamic or static) VARIANT 1: the following exercise puts much emphasis on stretching properly the elbow, the front deltoid and the pectoral.
In order to perform it you have to lay prone on the floor, hence belly down, place both arms completely extended to the sides so to form a cross with your body.
Bend one arm at a time, to form a 90° angle while keeping the elbow in line with your shoulder; to the opposite side as two main points of pressure place the hand near the shoulder and put one knee out bent on the floor as well.
Thanks to them, start pressing on the floor with the shoulder of the bent arm as well as with the hand to the opposite side so to help providing an effective stretch; look at the opposite side of where you stretch with your head.
This exercise can be performed in dynamic or static way.
In the first case whenever you apply pressure to stretch the part involved you also have to return to the initial rest position for repetitions, your head looks in the direction of stretch when you are resting and looks to the opposite side when you stretch; in the second case you have to hold the position and stretch
- Pectoral-front deltoid-elbow stretch VARIANT 2: compared to the previous exercise that is performed while laying prone on the floor, in this one you are going to stand and place your arm bent on a surface such as a wall or something similar.
The principle is that you wanna make sure to place both hand and elbow on the edge of the surface whilst the shoulder is left free to move in the space.
Why is that?! Because in this case, you have to lean forward with your shoulder while keeping firmly one arm bent placed at the edge of the surface/wall with just the elbow and hand.
With the opposite hand press down the shoulder left free, in direction of the floor, so to provide the wanted stretch and manage the intensity
- Lats-Triceps-Elbow foam roll + massage ball: compared to all the previous exercises we’ve seen, this one differs totally because of the fact that doesn’t concern a stretch or a specific movement, but more of a relief provided by using the foam roller or even a massage ball (more intense).
As we all know, a proper use of the foam roller leads to the so called “myofascial release” which, in poor words, equals to a de-load provided to tendons and muscles, through a massage more or less intense (depends on you).
Talking about the many different ways to provide relief to the elbow, this one comes surely in handy because it aims to soften the tissues and more in general muscles, from the tensions. From a practical side, if you lay on a side on top of a foam roller (or massage ball) at the height of your lat, while also extending above your head the arm and start massaging that area while moving farther away targeting also the tricep and elbow, all this consequent massage helps reducing elbow pain and not only.
The pain is intense especially at the very beginning, since you have to adapt your muscles and tendons to the massage and soften them; in most of the cases, they’ll be pretty stiff.
If you decide to try out also the massage ball, be aware that it goes deeper in the tissues thus take your time to adapt yourself to it.
As soon as you come across a trigger point, hold the ball in that specific point and try to breathe and relax until you feel less stiff, before going on with the massage.
How long shall you keep massaging?!
Well, it depends on you and in particular it depend on how stiff you are.
The softer the better, hence take your time to massage slowly the area involved so to get a relief also from a neural side; it’s your brain that sends to your body warning signals whenever it encounters a danger as it is gonna be whichever trigger point you have.
After the adaptation phase, when muscles and tissues are starting to get softer, your brain won’t send anymore warning signals as much as before since it starts to perceive those points as something not harmful for the body.
- Elbow flexors and extensors foam roll + massage ball: another not less important massage to consider when using the foam roller and/or massage ball, regards the forearm and in particular the elbow flexors (inner side) and extensors (outer side).
This kind of massage might seem a little weird to perform, but yet very effective for treating elbow pain in its both natures, lateral and medial epicondylitis.
Just kneel down keeping the foam roller or massage ball in front of you and place one forearm at a time on top of them.
Either you use a foam roller or a massage ball, the movement is the same, it varies only the intensity as for the previous exercise.
Start rolling back and forth from your wrist joint all the way down to the elbow and according to which part you wanna massage, flexors or extensors, make sure to rotate slightly the forearm so to expose that part better.
If you also place your forehead on top of the forearm, you will be able to get eventually a more intense massage, since you can apply more pressure