Front&back lever
![]()
Front & back lever progression
Many of you are wondering how to make the front and back lever. In this guide, we will discuss and show ways of progression, simple exercises and tips that will allow you to do these two
essential calisthenics poses.
The front lever and back lever made on the rings are one of the basic figures in the calisthenics
They are very spectacular, and their performance requires a lot of hard work and extraordinary strength. Gradual progression will allow you to get a perfect figure. This will have a big impact on the development of your body, strength and thus help you to make many arrangements in
this such a beautiful body sport. However, you must be prepared for hard work, for sweat and tears. Patience and diligence are the most important things at your trainings.The most beautiful things require a large own contribution. Creating the right habits, regular exercises and proper progression will help you achieve your dream figures and layouts.
Front & back lever are figures that must be built from the foundations
We will focus on gradually increasing difficulty level, so that’s will be done correctly. We will start with easier
figures that will allow your muscles to adapt to selected positions. For this reason, we will discuss the ways of progression that will lead you to the front & back lever.
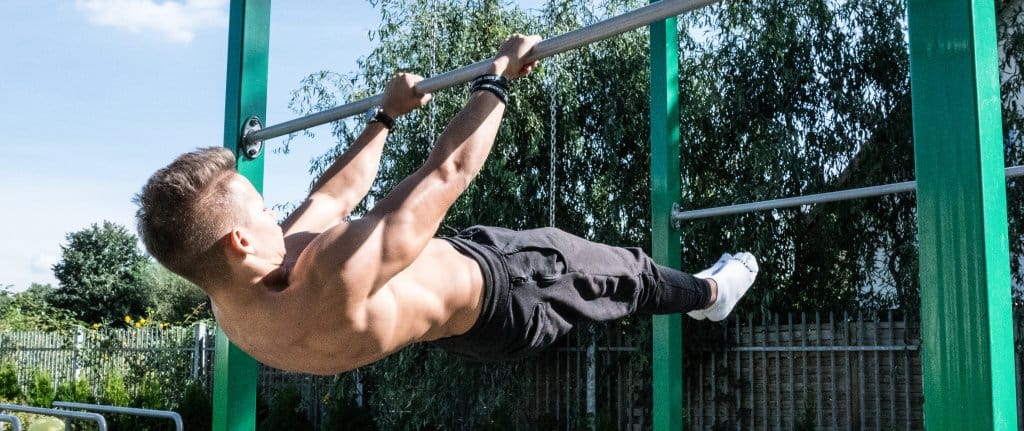
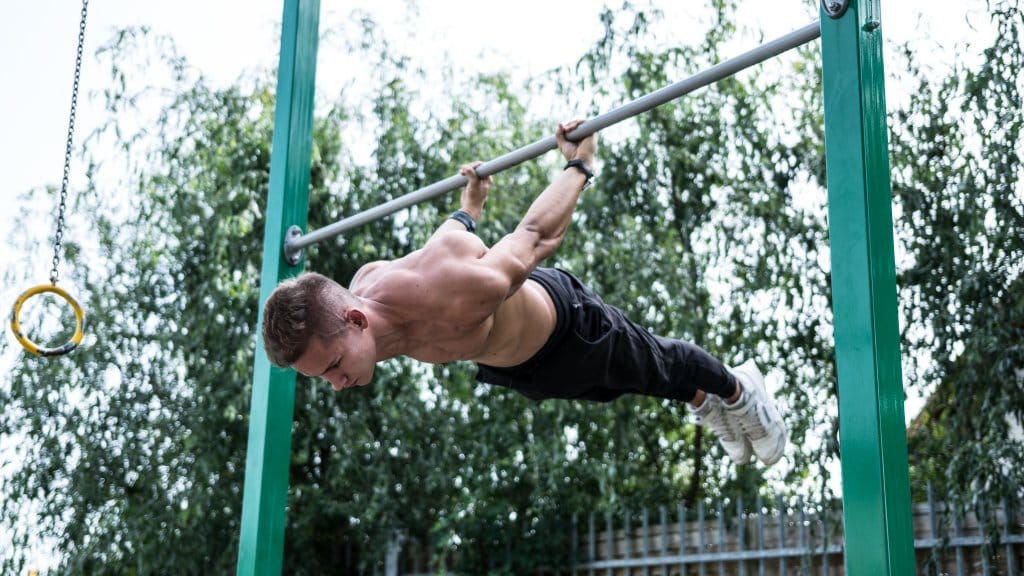
How to do the front lever?
The front lever is the figure you perform by grabbing the rings and leaning back, lifting your legs forward. You set your body in a parallel position to the ground in this movement. Your arms remain straight, your elbows locked, for the duration of the movement. It’s a movement that requires a large contribution of the strength of the shoulder muscles, because here they are the first violinist. In this exercise, you don’t rely on triceps or biceps.
This exercise requires a well-developed core. Abdominal muscles and lower back allow for keeping the torso and legs parallel. They are here stabilizers of your figure. Without the proper
strength of your loins, your legs will fall. Without a developed abs, you will not reach a position parallel to the ground. In this figure, your body is involved from the shoulder muscles to the feet, which symbolizes the harmoniously and proportionately developed figure.
 How to progress your front lever?
In the Internet, we can set eyes on many ways of progression in order to make the correct front of the lever. However, I assume that the more combining, the smaller the effect. There aren’t
magical ways. In the case of body sports, the most effective method will be to stay at the old school.
Tuck lever is a great method of progression. How to progress?
We will split everything for a few moves. You will be practising every pose until you get to perfection. Then you will be able to go to the next one.
At the beginning, you grab the rings and hang freely (as on the pull rod). Then you pull the blades and try to push the chest forward as much as possible, leaning to the angle of forty-five
degrees. You must remember at this point to activate your core, so tense your abs. This is the necessary thing you must to do. It looks a bit like a movement of pulling.
If you practice this move correctly, you can go to the next step.
After doing the previous activities, you bend your knees and lift them towards your head. In this case, you have to practice it conscientiously and long until your body is set in a orizontal direction to the ground, and even lean your body with your knees folded back. (it looks like backflip).
These two steps are really important. You must have them well trained to do them without any problems.
The next checkpoint will be…
Tuck lever
You bind the blades, then push the chest forward, wrap the knees, lean back.
And now the most important! You lean very slowly to the position where your torso is parallel to the ground. You must have your knees wrapped up all the time. Here the first violinist is
entire core, which helps you to stay in this position. If you managed to do this figure, congratulations! You reached your first tuck lever!
Tip: To practice a great tuck lever, a good method will be the repeatability of the last movement
When you are fully tilted back, we return to the tuck lever. Then with the tuck lever, you lean back again. Repeated exercise of this movement will allow you to achieve perfection.
If you’re ready to go one step further, we’ll start preparing for Front lever.
In the final movement of the tuck lever, being in a horizontal position to the ground, you unlock your knees slightly forward to be in the “sitting” position (the paradox is that you aren’t sitting) and create between quadriceps and calves an angle of forty-five degrees or similar. This position is called open tuck. If you’re tired of practising this figure, go back to tuck lever. You take one step back to make two forward. Using this metod ,you will be able to achieve the best, optimal results
Another element of progression is front tuck with leg extention. This is a move that will improve you core and torso muscles. It’s all about doing the front tuck (at the maximum tilt back), and then straightening one of your legs towards the sky, as if you wanted to touch it by your foot. You’re still keeping your second leg correctly with the front tuck scheme. If you have a problem with doing this exercise, back to practice the previous variation. Patience is a guarantee of success here.
If you put in enough time and work into practising this figure, we can go to the next part.
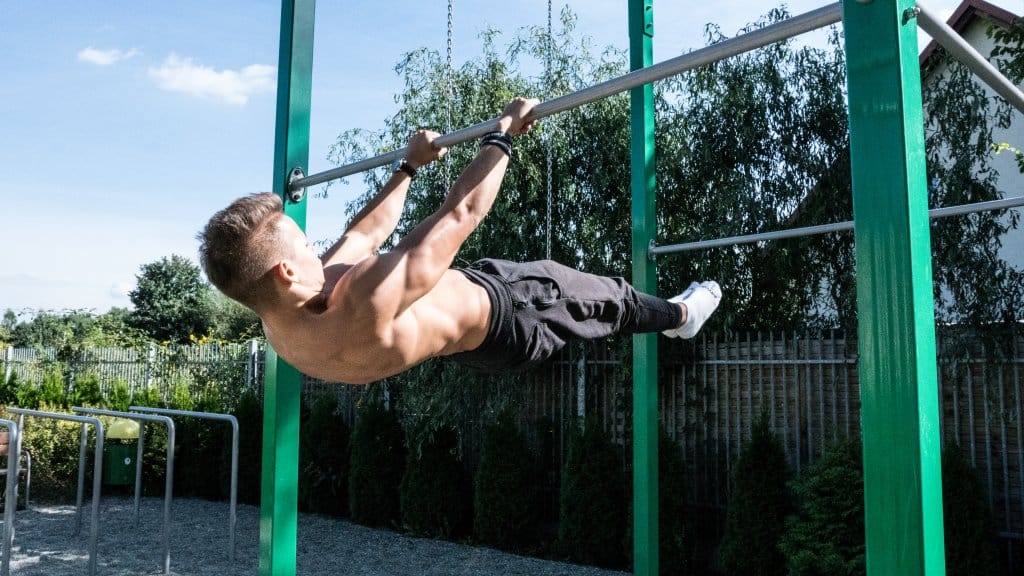
When performing front tuck with leg extension, namely in the position where one of your legs is maximally straightened and the other one is bent, you activate the core (you tense the abs)and slowly begin to lower your body, so that it’s parallel to the ground.
At the beginning, it’s not easy for you to straighten your body in a straight line. Just try to go lower and lower.
This is a half-front lever, because you don’t have to straighten the second leg to the full front of the lever.
However, it isn’t as simple as it may seem. It requires a lot of work. Practice, practise and practice once again. When you’re ready, try to straighten out your second leg and do your first front lever. Let everything go smoothly, follow every step mentioned in this guide conscientiously. Remember. Practice makes perfect.
The back lever & progression
Now we will deal with back lever. This is one of the basic figures in calisthenics, just like the front lever.
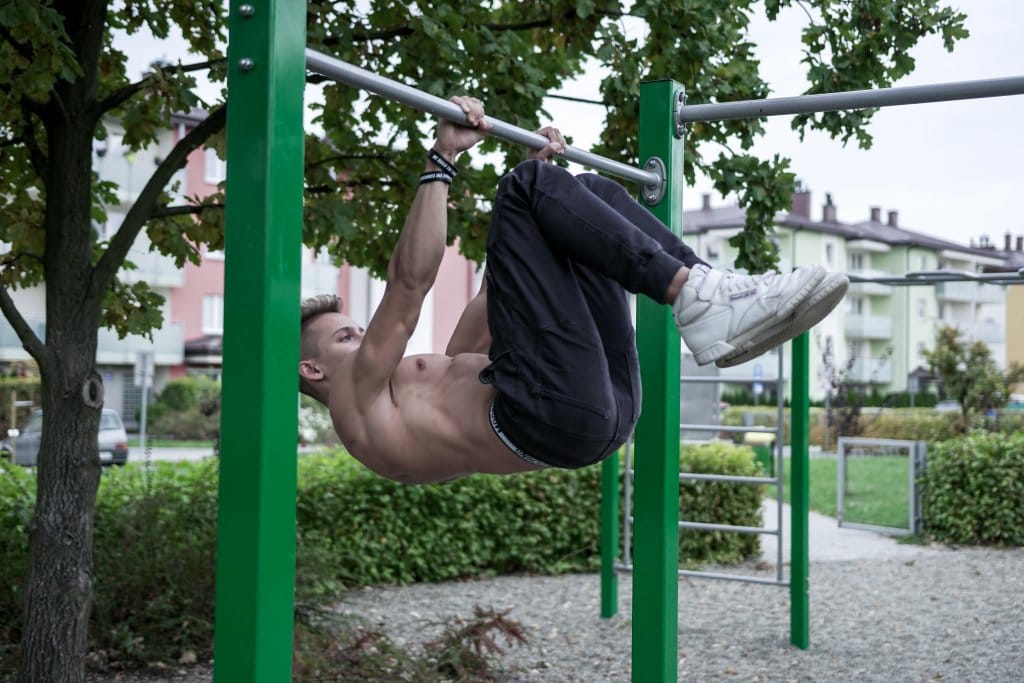
To make it easier, let’s start with tuck back lever.
The first step you need to do is to hold the rings as you would like to pull up. Then you lift your legs up and rotate your position about 360 degrees. Your knees are close to the chest and
connected together. They are maximally bent. At this point, the position of your wrists determines the involvement of the muscle party. If your wrists are in a neutral grip, you are engaging your biceps. However, if they are turned inwards (similar to a hammer grip), this part of the work is taken over by arms. Exercising this position will help you achieve back lever.
The level above is advanced tuck back lever. If you have mastered the previous exercise, try to make them so that your thighs create a right angle with the torso. It will be a bit harder, due to the greater involvement of the abdominal muscles.
Next, it ‘s worth to be interested in the figure of advanced back lever open. It ‘s a pose where you do everything according to the previous position described here, while your legs aren’t
joined and separated from side to side. (it looks like the swimming style called “breaststroke”).
If it didn’t cause you a problem, try straddle back lever. This position is particularly difficult because your legs are completely straight and tilted in opposite directions when leaning back. They form the letter V from the waist down.
Tip: Each of the above figures makes the gymnasts become more and more difficult due to the involvement of the core muscles. Each, greater calisthenics poistion requires a better contribution of strength, so it’s important to gradually develop the positions chosen by us.
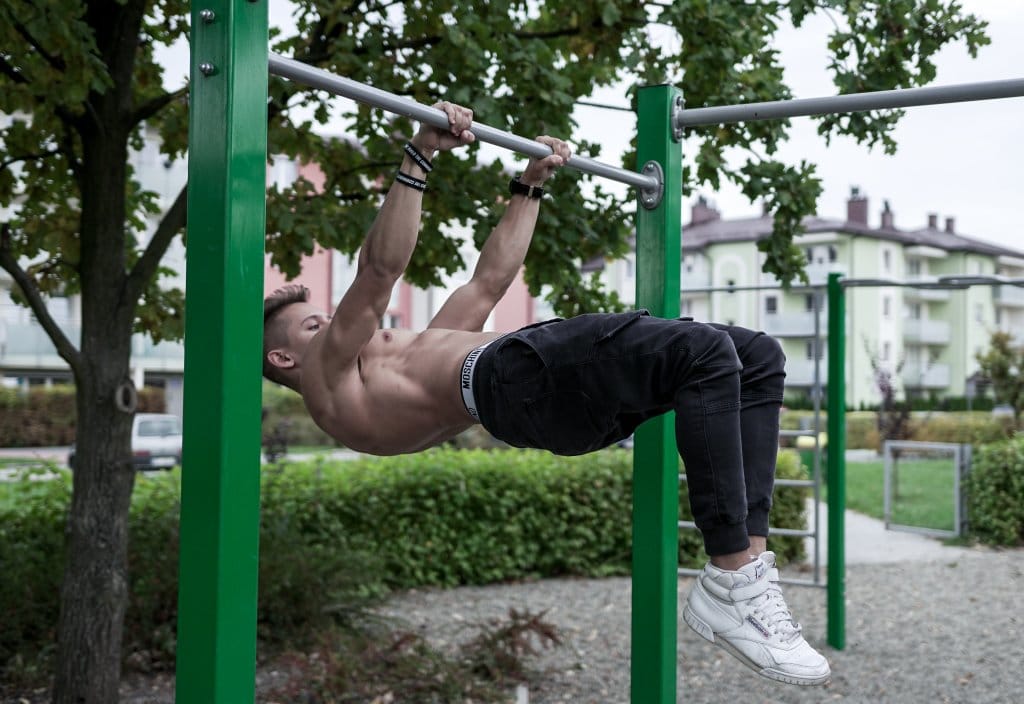
If you can already do all of the above exercises, let’s try to stand a step away from back lever. When leaning back, connect the legs together, at the same time having bent knee joints in the way that they create a 45 degree with harmstrings muscles.
If you fail, try again, but try to do it very slowly. Concentration is the key. Are you ready for the next step?
So…How to do back lever?
The truth is that if you’re able to do previous exercise, back lever shouldn’t create a problem for your body. Now try to do the same with fully straightened legs. Managed to? Big congratulations! However, if you still can’t perform the figure correctly, step back and practice all the previous figures recommended in this guide.
Remember that you can advance to the next figure only, when you are ready for it. You must be able to do it perfect. The spine must be straight. Holding a few seconds in a position doesn’t
mean that you can practise next figure. You have to stand much longer and perform the figure without a imbalance in your body. Patience and maturity in your own activities will make you great.
The devil’s not so black as he’s painted.
Keep going brother!
The most important thing is NOT to be offended by failures, because failure is the best teacher. Calisthenics is a beautiful sport that shows the strength and vitality of the human body. It’s worth devoting your time to it, to maintain health and shape a proportional figure. For that purpose, we created this guide. To improve your mental & physical condition. From hothead to people who are starting their adventure with such a beautiful sport discipline.
Really loved your workouts bro
Keep up the good work